Outside
Worms are very useful in the Garden; they aerate the soil, making it healthy. They also turn old leaves etc. into plant food. Have a go at making our wormery and see for yourself!
Children are to help with activities, but adults should lead the activities.
Materials Needed
2 Litre plastic bottle (pop or water etc.)
Scissors
Duct tape or sticky tape
Soil
Sand
Water
Food scraps
Elastic bands
Cling film
Black plastic bag
Clothes pegs
Spade/trowel
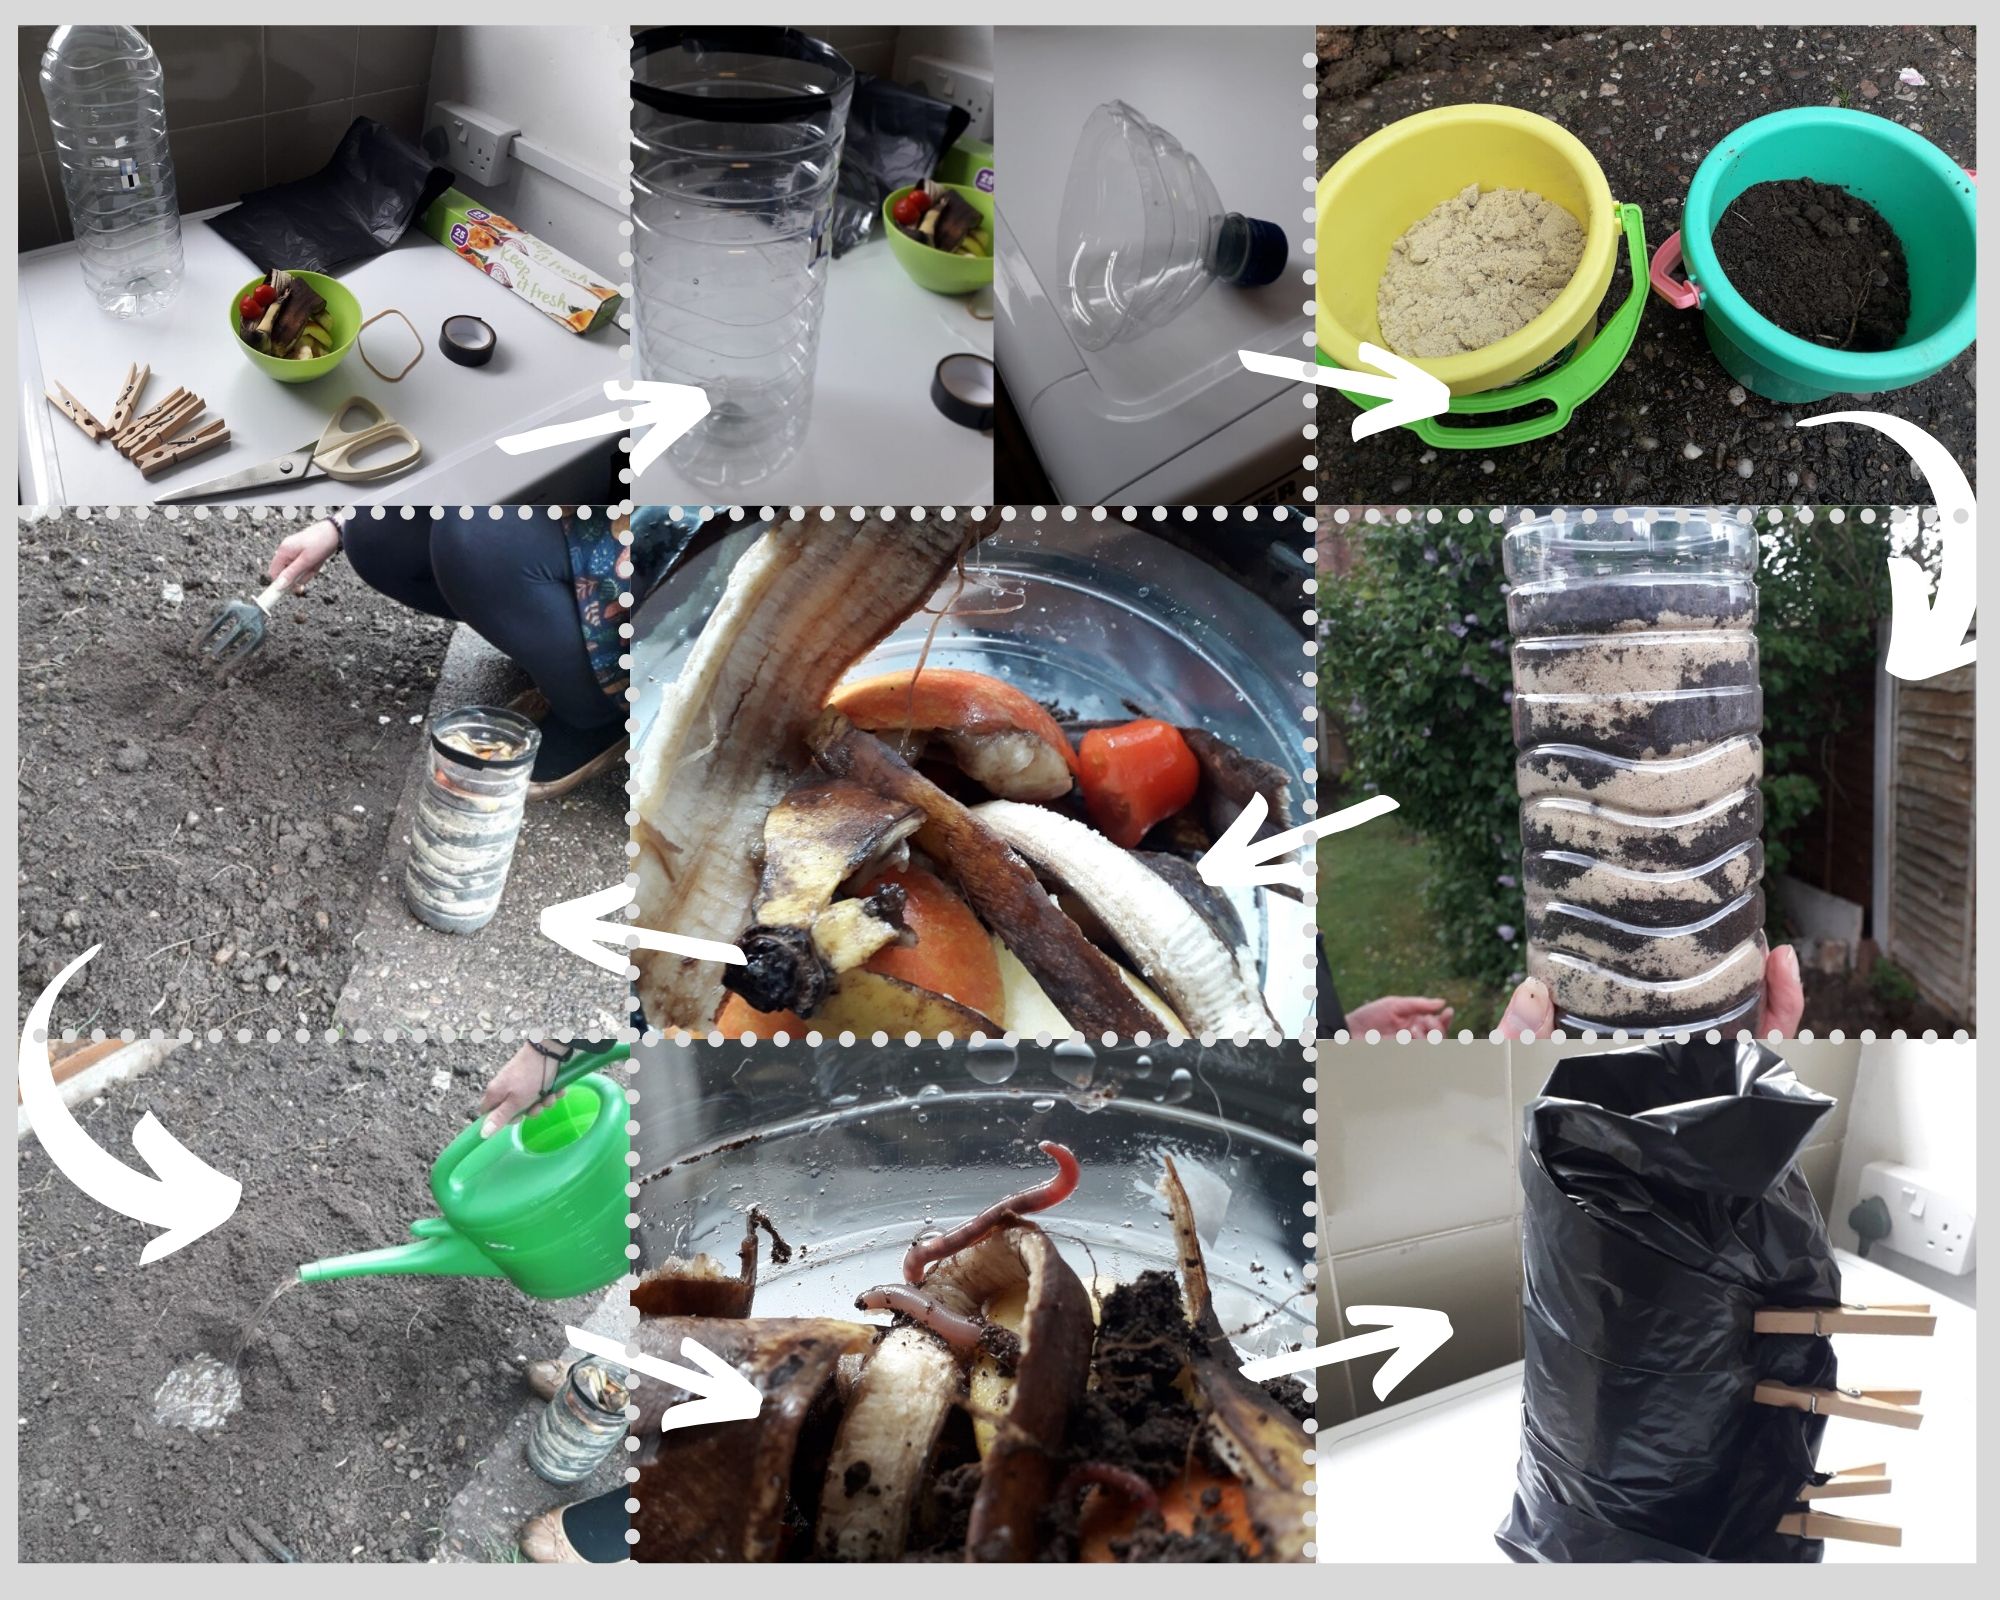
Instructions -how to make your wormery:
1.Firstly get a grown up to cut the top off the plastic bottle about 9 cm from the cap.
Do not throw this away you can use it to scoop the soil and sand into the bottle or catch your worm if you do not want to pick them up.
2.After the cut, if the top of the rim has a jagged edge put some of the tape around it to make it smooth.
3.Next add a 5 cm layer of soil to the bottom. Then add a 5cm layer of the sand, then another 5cm of soil and a 5cm layer of sand until you come to about 8 cm off the top. Layer the food scraps on the top, i.e. over ripe fruit, banana skins, vegetables etc.
Leave about a 5 cm gap at the top.
4.Now you are ready to find your worms! Find a patch of soil and using a hand fork or trowel dig down. If you do not find any worms for a while you can encourage them to come to the top. Ever you ever seen the birds pecking at the grass and soil after the rain? This is to find their food – worms.
Dig into the soil a little and make a hole. Fill this with water. Now tap around the hole with your spade or fork. You are now encouraging the worms to come to the surface. This may take about 30 minutes or so.
5.When you have found them pop them on top of the bottle, probably no more than 4
Cover the bottle with the cling film and secure with an elastic band. Don’t forget to make some holes in the cling film so the worms can have air
6.If you want to take a picture of your completed wormery before you put the plastic bag on. We would love see pictures in the comments!
7.Take you black plastic bag and wrap it around the bottle to keep out the light, which worms do not like. Secure the bag with the pegs or another elastic band.
Place somewhere dark and cool, but not freezing and leave the worms to work.
8.Check the bottle every couple of days and see what the worms have done. Have they mixed up the layers? Have they eaten the food?
9.When the worms have mixed up the layers and eaten the food, (they do not need to have eaten it all) then take the bottle back into the garden and release the worms for them to work back in the garden.